We love to travel! We are planning a trip to Disney World next summer! I have been researching lots of tips, ideas etc. John is a zoo and aquarium lover so I am sure you will find a lot of ideas from here posted here! Fun, Fun, Fun!!!
We have chosen to add a meal plan to our Disney package, so instead of using our credits for drinks, chips and the like, I have been researching what the best choices for snacks. (We plan to carry our own water, which you can order and have delivered to your hotel room). Here is what I found! These may be available at other places as well but this is where I found them available..
Cinnamon rolls--Magic Street Bakery-Magic Kingdom. Good choice for breakfast and save up some of your meal points.
Crepes and Ice Cream----Chef de France restaurant- Epcot
Dole Whips---Aloha Isles-Magic Kingdom
Mickeys Premium Ice Cream Bar
Zebra Domas-Maras-Disney's Animal Kingdom Lodge
Kaki gor (shaved ice with fruit topping)-Japan Pavilion-Epcot
Beignets-Port Orleans-French Quarter
Caramel and Candy Apples
Popcorn
Churros
Fudge
Chocolate Chip Cookie Sandwiches-Magic Kingdom
Salad and Soup-Sunshine's Seasons-Epcot (would be great for lunch as well)
Egg Rolls and Fried Rice-Anadapur Local Food Cafe-Animal Kingdom
Lobster Roll-Food and Wine Fest (I am not sure if these are available year round)
Baked Potato-Liberty Market Square
Butterfinger and Chocolate Peanut Butter Cupcakes-Starring Roll
Assorted Candy and Cookies-Goofy's Candy Co
Sundaes-Pop Century Food Court
Funnel Cakes-Sleepy Hollow
while it’s not listed on every menu, you can use your snack credit for a bowl of chili at Casey’s Corner.
The Pirates League! Disney World
If ya have a little pirate, this sounds like a lot of fun. Its 29.95 per person and you can make reservations at 407.wdw.crew-----be sure to set aside 30-60 minutes for this special time for your pirate. You have 2 packages to choose from as well--"The First Mate" or "Empress". All packages include:
- Choice of facial effect (5 to choose from)
- Reversible bandana
- Earring and Eye Patch
- Sword and Sheath
- Temporary Tattoo
- Unique Pirate Coin Necklace
- Personalized Pirate Oath
- Official Pirate Name
- Removable Teeth*
- Participation in a daily Adventureland Pirate Parade
Costumes, headwear, and imaging sold separately and are available at the location
CHARACTER SPOT!
Be sure to bring your autograph book and pen for your little one! This will be a great spot for them to collect the autograph from all the favorite characters! (I collect swagbucks and purchase amazon gift cards which sales Disney autograph books---ORDERED SEAN'S FOR FREE!)
CHARACTERS:
- Chip
- Dale
- Baloo
- Donald Duck
- Daisy Duck
- Mickey Mouse
- Goofy
- Minnie Mouse
- Pooh Bear
- Pluto
- Timon
- Tigger
LOCATION:
In Future World at Disney Epcot. From the entrance go under the right side of Spaceship Earth and continue towards the center of Future World where the fountain is located. This character greet is on the right side of the fountain.GREET EXPERIENCE:
Disney's latest character greet experience. If you are up for the long queues to meet your favourite Disney character, then this is the place for you. On the same site as the old Character Connection, the darkened windows have now been opened up so all that pass can see the characters. This has greatly increased the visitors, though at least the queue is inside with air conditioning.I found this recipe while researching----sounds delicious! Can't wait to give it a try!
Cream of Mushroom Soup From 1900 Park Fare at Disney's Grand Floridian Resort and Spa
Yield: 9 (6-ounce) servings.
Ingredients:
2 tablespoons butter
1⁄2 of a medium onion, diced
3 celery ribs, diced
1 garlic clove, minced
4 tablespoons flour
1 tablespoon dry white wine
4 1⁄2 cups chicken stock
2⁄3 cup whole milk
1 bay leaf
8 ounces mushrooms, sliced
2⁄3 heavy cream
1 teaspoon salt
1⁄4 teaspoon white pepper
Instructions:
1. Melt butter in 2-quart sauce pot. Add onion, celery, garlic; sweat until translucent, stirring occasionally.
2. Add flour to pan when butter pools from the vegetables. Stir until incorporated. Cook slowly for 5-8 minutes to develop the thickening power of the flour.
3. Whisk in the dry white wine, chicken stock, whole milk and bay leaf to the contents of the pan. Stir until soup simmers and thickens slightly,
4. Add mushrooms to the soup; allow to simmer for 20 minutes to develop soup’s flavor. Remove the bay leaf. Finish with heavy cream and season to taste with salt and pepper. Serve hot.
Yum!!!! Cannot wait to fix these for my 2 guys!!!
DIY Disney: Chocolate Lava Cake from California Grill
Today, Chef Big Fat Panda’s DIY Disney Recipes column brings us a mouth-watering favorite from the Contemporary Resort’s California Grill. Take it away, Panda!Hello! Chef BigFatPanda here!
Please forgive me for being away for so long. Life took hold of me and wouldn’t let go. I am sure you’ve been there. I am so delighted to bring you this new installment of decadent Chocolate Pleasure. The following is from Disney’s Contemporary Resort’s California Grill — Chocolate Lava Cake!
Let me share with you that this appears to be an easy straightforward recipe, but it was tougher than it looked. I try to choose recipes that are approachable and not very intimidating. While this is all those things, the effect of the “lava” is something that can easily be messed up. The good part, and why I urge you to try it, is that the worst thing that can happen is that you have a delicious chocolate cake with no lava.
As usual, the recipe’s instructions will be bolded for easy reference should you wish to print this out and skip my commentary. How could you though, seriously?
RECIPE INGREDIENTS:
8 1-ounce semisweet chocolate squares, chopped
or 1 cup semisweet chocolate chips
2 whole sticks of butter
5 egg yolks
4 whole eggs
3/4 cup sugar
1/3 cup all-purpose flour
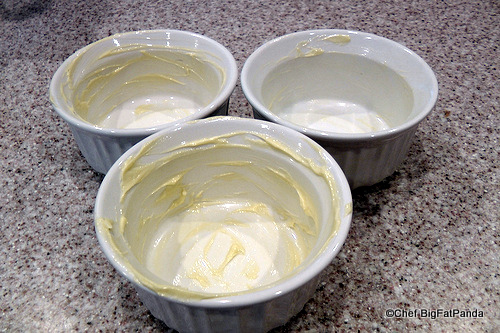
1. Preheat oven to 375°F. Lightly butter sides of 6 individual (3/4 cup) ramekins. Lightly coat with sugar, shake out excess.
I got some nice Corningware ramekins at Wal-Mart. They were sold as a set of four for around $12 and really looked stylishly more expensive than that. I opted to get my hands dirty like a real chef and butter up my ramekins with my fingers. You can easily spray them with Pam though.
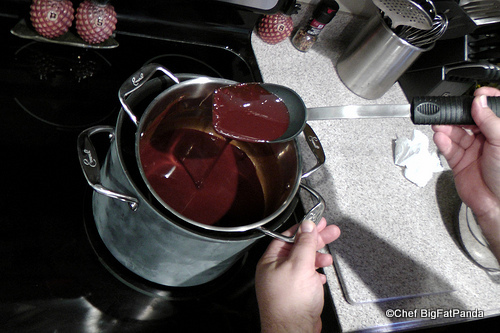
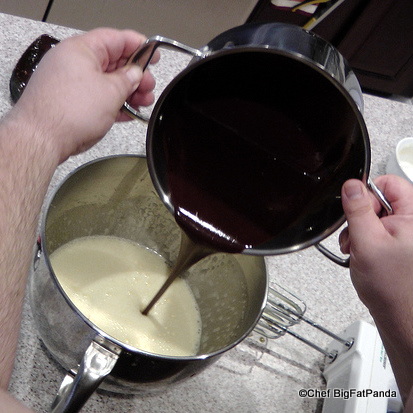
2. Melt chocolate and butter in top of double boiler set over simmering water. Stir until smooth. Remove from over water and cool 10 minutes.
If you don’t have a “double boiler” set, you can make one using a deep pot and a smaller pot that is able to be floated safely in the larger pot. Using cold water, test how much water will be needed in the larger pot to float the smaller pot without water spilling over the sides. Then boil it up and place the smaller pot with ingredients to be melted into it. There is something heavenly about melting Chocolate and Butter together. Oh, I know what it is – it’s the fact that you’re melting Chocolate and Butter together!
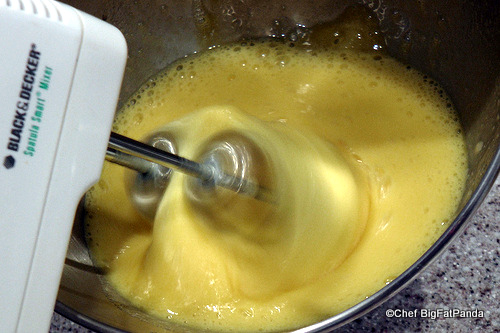
3. Beat egg yolks and whole eggs together in a large bowl; add sugar and beat until thick and light, about 2 minutes
As I was making this recipe, like many cakes, I had a realization that it’s basically a Chocolate flavored scrambled egg. I mean, really now – look at these ingredients. It’s a lot of egg and a bit of other things. Make sure you read the recipe correctly. Another way to look at it is 9 egg yolks and 4 egg whites.
4. Fold in chocolate mixture.
Folding is basically mixing while keeping more air in the mixture than would be released with a violent stir. Using a spatula or large spoon, slowly layer in the Chocolate. You will be incorporating the ingredients together while maintaining a level of airy fluffiness in the mixture.
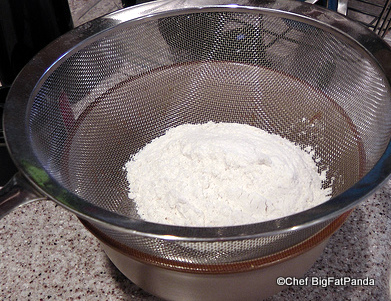
5. Sift flour, then fold into batter, mixing until smooth.
6. Divide batter among prepared cups, filling 3/4 full.
A secret suggestion I have is to fill one ramekin with slightly less batter than you’re supposed to and save this batter (lava) as an emergency stash in case you end up lava-less.
7. Place on a baking sheet and bake about 35 to 40 minutes or until sides of cake are set and middle is still soft. Do not overbake.
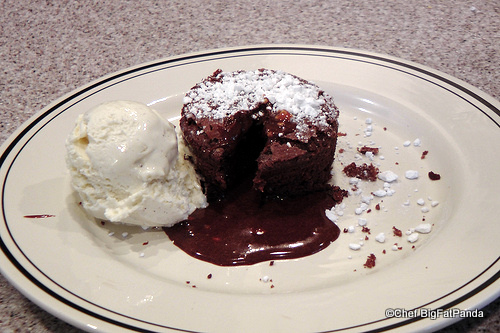
8. Using a small knife, cut around sides of cakes to loosen. Invert onto plates and serve with your favorite ice cream.
See that “Do not overbake”? This is very important. The goal is to bake the outside of the cake, leaving the inside somewhat raw to create the lava effect when it’s cut open.
Let me stress that this is VERY hard to accomplish. Why? Because a cake like this must be removed from the hot ramekin at the precise temperature where the cake is solid enough on the outside to be neatly removed and raw enough on the inside to create the liquid lava center. If it is allowed to cook for just a few minutes more, you will have a solid chocolate cake. Still not a bad result, but don’t call it a Chocolate Lava cake.
After 25 minutes, I had a feeling that the 35 to 40 minute estimate was way too much. I took out a cake and I was literally spot on. It was perfectly done. I took the rest out right away and it was too late for them. So, I got one great Chocolate Lava cake and many other chocolate cakes.
I do not understand how they could be so off on their time as I double-checked my standard ramekin size and oven temperature. My suggestion is to make MORE than you need and test early on and remove them ASAP. If you fail with the “lava,” pour some on and tell people that “You meant to do that!”
These were absolutely delicious with or without lava. A Vanilla Bean ice cream (one with those black vanilla bean specks) is the best choice here. The hot cake with the Vanilla ice cream is just beyond words. It’s sinful and something you feel privileged to enjoy.
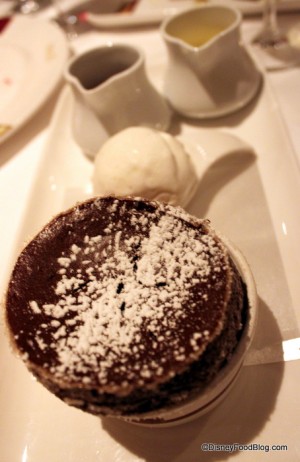
Disney Dream Recipe: Chocolate Souffle
When I sailed on the January Christening Cruise and completed the Disney Dream Dine Around, the dessert at Palo was a highlight. Here’s the recipe so that you can try it at home!Where to Find It
The Chocolate Souffle is the popular dessert created at Palo aboard the Disney Dream. Palo is the adults-only restaurant that requires reservations.Here’s the recipe…
How to Make It
Chocolate SouffleServes 6
3 tablespoons butter, plus more for greasing the soufflé cups
6 tablespoons sugar, plus more for dusting the soufflé cups
1 cup milk
3 tablespoons all-purpose flour
3 tablespoons Dutch-processed cocoa
2 ounces (2/3 cup) semisweet or bittersweet chocolate, melted
4 eggs, separated
Vanilla Sauce (recipe follows)
1. Preheat oven to 350°F.
2. Set a full kettle of water on to boil.
3. Butter six 4-ounce soufflé cups and coat with sugar; set aside.
4. Bring the milk to a boil in a small saucepan, meanwhile; melt the butter in a medium saucepan over medium heat. Add the flour and cocoa to the butter and beat with a whisk to a smooth, paste-like consistency. Reduce heat and cook for 1 minute.
5. Slowly add the hot milk, whisking until smooth, then blend in melted chocolate. Let cool for 5 minutes, then stir in egg yolks.
6. Beat egg whites in a separate bowl until frothy. Slowly add sugar, 1 tablespoon at a time, until stiff, glossy peaks form. Stir a heaping spoonful of egg whites into the chocolate, then fold in the remaining whites just until combined.
7. Pour the batter into prepared soufflé cups. Place cups in a large baking dish and add enough boiling water to reach halfway the sides of the soufflé cups.
8. Bake for 20 minutes. Serve immediately, with warm vanilla sauce.
Vanilla Sauce
1 1/4 cups heavy cream
1/4 vanilla bean, split lengthwise
3 tablespoons sugar
2 small egg yolks
1. Bring cream and vanilla bean to a low boil in saucepan over medium heat.
2. Combine sugar and egg yolks.
3. Add 2 spoonfuls of boiling cream to egg mixture and stir well, then pour back into the remaining cream and continue to cook over low heat, stirring constantly for 3 to 4 minutes.
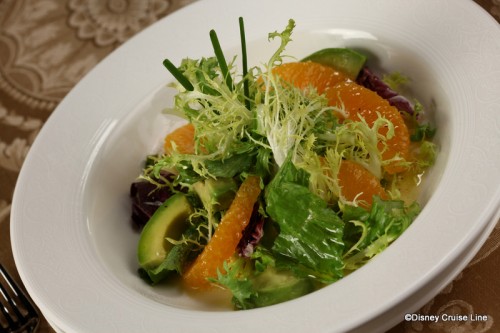
Disney Dream Recipe: Avocado-Citrus Salad
As I continue with my coverage of the January Christening Cruise Disney Dream Dine Around, I’m excited to add another tasty recipe from Disney Cruise Line’s newest ship!Royal Dining
At the Royal Palace Restaurant aboard the Disney Dream, you’ve gotta try this Avocado-Citrus Salad. The healthy ingredients are a great way to counteract all of those desserts you’re getting at CabanasWhere to Find It
The Royal Palace Restaurant is one of the three restaurants that cruisers can enjoy in their rotational dining. Check out this photo review of the Royal Palace Restaurant, to see even more yumminess from the menu.Speaking of — check out the Royal Palace Menu as well! Never hurts to plan out your meal…
How to Make It
Avocado-Citrus Salad RecipeServes 4
Citrus Dressing Ingredients
1/4 cup fresh orange juice
1/2 lime, juiced
2/3 cup olive oil
1/2 teaspoon coarse salt
1/4 teaspoon freshly ground black pepper
Avocado-Citrus Salad Ingredients
4 navel oranges
3 ripe Hass avocados, halved and pitted
6 cups mixed baby lettuce
For the citrus dressing:
1. Combine orange juice and lime juice in a medium bowl. Slowly drizzle in oil, salt and pepper, whisking vigorously until combined. If making in advance, re-whisk before serving.
For the avocado-citrus salad:
1. Cut peel, including the white pith, from the oranges with a small knife. Cut segments free from membranes; set segments aside and discard membranes.
2. Cut avocadoes into 3/4-inch-thick slices.
3. Divide mixed greens among 4 salad bowls. Top with 5 avocado slices and 5 to 8 orange segments; drizzle lightly with dressing. Serve immediately.
How fun will this be to make!!!!
Disney Food Recipe: Pop Century’s Tie-Dye Cheesecake
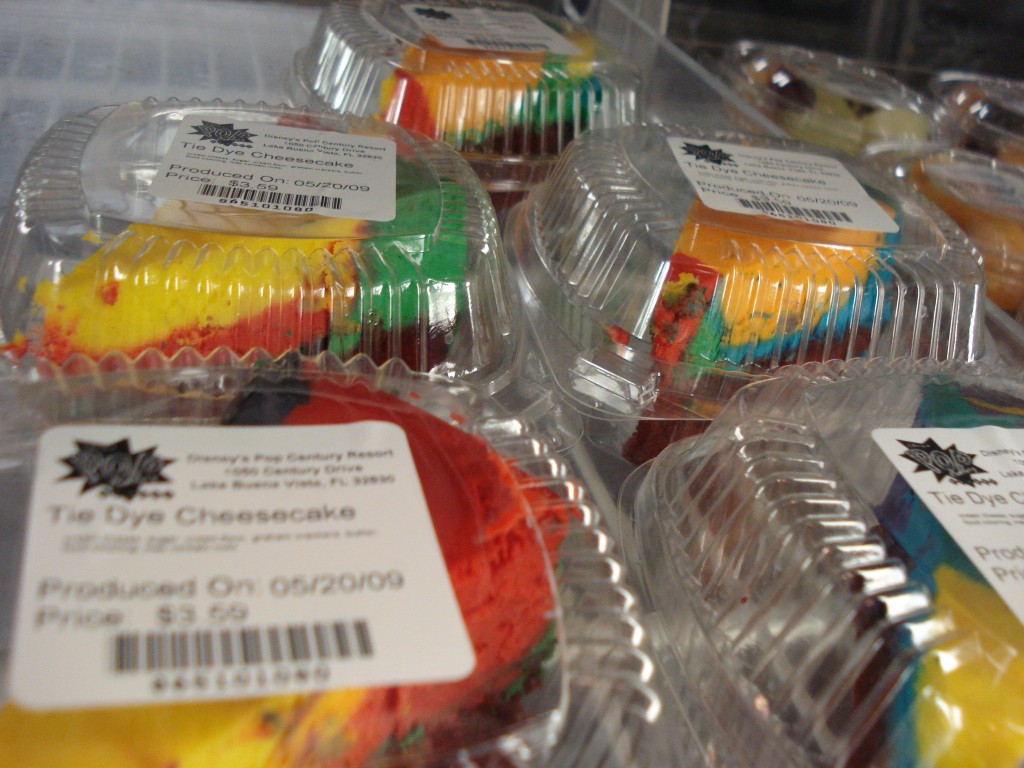
This cheesecake was a hot topic when POP Century Resort first opened in 2003 (do you remember?), and it’s still as weird, wacky, and delicious as it ever was.
Now, Disney’s got some “pricier” cheesecakes around property, but it’s tough to beat this one for outright fun. This’ll be a great alternative to standard birthday cakes for those old hippies in your life
Recipe:
Red Velvet Cake (“crust” portion):
1/4 c butter, softened
3/4 c sugar
1 egg
1 tablespoon cocoa
1 ounce red food coloring
1/2 teaspoon vanilla
1/2 teaspoon salt
1/2 c buttermilk
1 c flour
1/2 tablespoon vinegar
1/2 teaspoon baking soda
Preheat oven to 350 degrees F. Grease the bottom and sides of a 9″ springform pan.
Cream together butter, sugar, and eggs. Make a paste of cocoa and food coloring. Add the paste to the creamed mixture. Mix salt and vanilla in buttermilk and add alternately with the flour. Mix soda and vinegar separately, add last, folding in. Do not beat after adding soda mixture. Pour batter into prepared pan. Bake at 350 for 30 minutes or until tester comes out clean. Cool cake in pan.
Lower oven temperature to 325 degrees F.
Cheesecake Filling:
1 1/2 lb. Cream Cheese
1 1/3 c Sugar
5 Large Eggs
16 oz. Sour Cream
1/4 c Flour
2 teaspoon Vanilla
2 teaspoon Lemon Juice
NOTE: All above ingredients should be at room temperature before you begin.
Preparation:
Start by beating the cream cheese until light and fluffy. Keep the mixer on a low setting throughout the beating and mixing process. Add the sugar a little at a time and continue beating until creamy. Add one egg at a time and beat after each egg. When eggs have been mixed into the cream cheese add flour, vanilla and lemon juice, mix well. Add the sour cream last and beat well.
Divide the batter into 6 bowls and color each one:
red, purple, yellow, light blue, green, orange
To assemble, drop large spoonfuls of the colored batters randomly on top of the red velvet cake still in the pan. Swirl each layer slightly. Place on the top rack in the middle of a 325 degree preheated oven for one hour and 15 minutes. When time is up, prop open oven door and leave the pan in the oven for one hour. After one hour, remove from oven. Let cool enough before the cheesecake is put into the refrigerator for 24 hours.
Thanks to the Pop Century Fan Site for the photo!
Disneyland Hotel Banana Bread
I’ve included the recipe for this one at the end of the post. The meatloaf recipe can be found here.
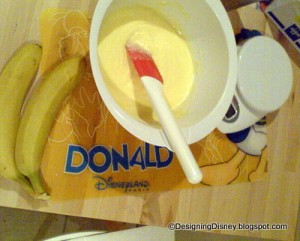
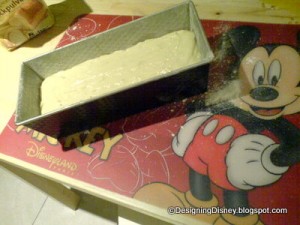
All ready!
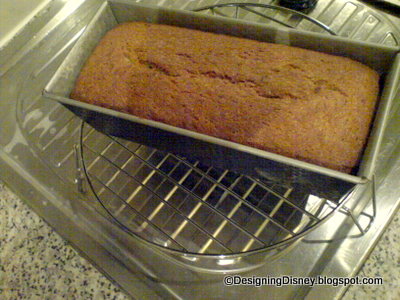
Max — Thank you for sharing your culinary prowess with us! Bon Appetit!
Disneyland Hotel Banana Bread Recipe
Ingredients
* 1 cup butter
* 1/4 teaspoon vanilla extract
* 2 cups sugar
* 3 cups flour
* 2 eggs
* 1/2 teaspoon salt
* 2 teaspoons water
* 2 teaspoons baking soda
* 2 cups ripe bananas (Mashed)
Directions
Preheat oven to 350 degrees.
Sift together Flour, Salt and Baking Soda — Set Aside.
Mix melted Butter and Sugar until well blended.
Add Eggs one at a time, mixing well after each one.
Add Water.
Add Bananas and Vanilla — Mix well.
Fold in Flour mixture until well incorporated.
Grease 2 loaf pans and divide batter equally between the 2 pans.
Bake for 1 hour or until center of loaf is firm and a toothpick inserted to the center comes out clean.
DIY Disney: Mom’s Meatloaf From 50’s Prime Time Cafe
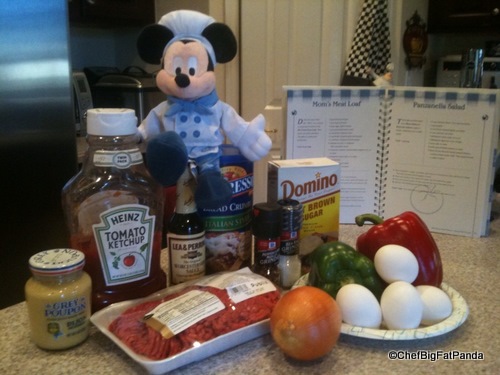
Ingredients
This is straight from a Disney Cookbook — let’s begin with what ingredients we need:
2 Pounds of Ground Beef
1 Pound of Ground Pork
4 Large eggs, lightly beaten
1 cup seasoned breadcrumbs
½ cup finely chopped onion
¼ cup finely chopped green bell pepper
¼ cup finely chopped red bell pepper
2 Tablespoons Worcestershire sauce
(another) ½ teaspoon Worcestershire sauce (to be used separately)
½ teaspoon of coarsely ground black peppercorn
½ teaspoon coarse salt
½ cup Ketchup
1 Tablespoon Brown Sugar
1 Teaspoon Dijon Mustard
First of all, don’t let any of the ingredients scare you; for example, you can certainly substitute regular salt for coarse salt if you need to. There will be a slight variation in flavor, but nothing earth shattering. I say this because some people (me included) can look at an ingredient list and abandon trying the recipe because some of the ingredients are just funky or not too common. I personally try to be authentic to the recipe whenever possible, but improvise when necessary.
1. Preheat oven to 350 degrees F – Lightly oil or spray 2 loaf pans (even lasagna type trays)
2. In a large bowl, combine the beef, pork, eggs, bread crumbs, onion, green pepper, red pepper, 2 Tbsp Worcestershire sauce, cracked peppercorn, and salt until well mixed.
Pork tends to contain more fat than beef. I would bet a reason they ask for pork is to make sure the meatloaf remains moist. That being said, you could certainly omit the pork and go with all beef. It would be healthier to use a Sirloin-type beef as I did, but the higher the fat content (e.g.: Chuck), the moister the meatloaf will be.
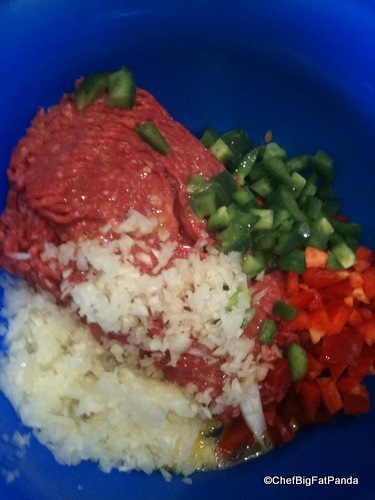
Ready to Mix
Now that I am looking at my mixture, I probably could have chopped my peppers more finely, but there’s no going back now. I use a handy little inexpensive food chopper for the onions. It gets them finely chopped in no time. It is not, however, good for chopping peppers. You wind up with skins and juice only. So, you’re going to have to cut the peppers as finely as you can on your own. It’s Fun!
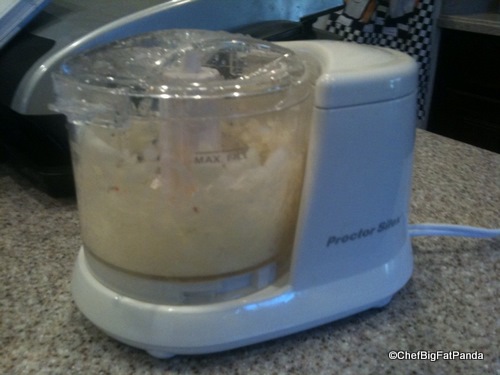
Chopped Onions
There is a sense of accomplishment when those halves go into the oven. They are transforming from ugly to delicious. It just happens!
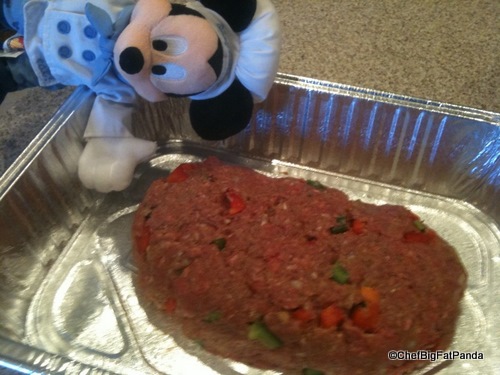
Meatloaf in Pan
4. In a small bowl, stir together the ketchup, brown sugar, mustard and 1 Tsp of Worcestershire sauce. After your meatloaf cooks it’s initial 50-60 minutes, brush the tops of them with this sauce and bake an additional 10 minutes.
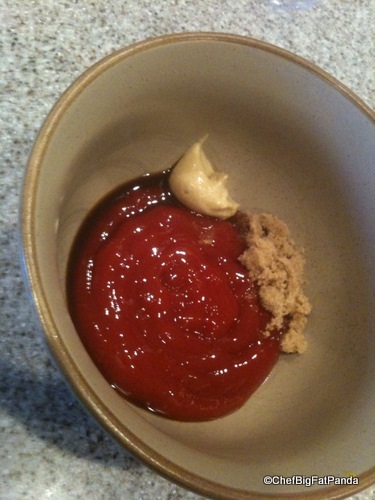
Tomato Sauce Ingredients
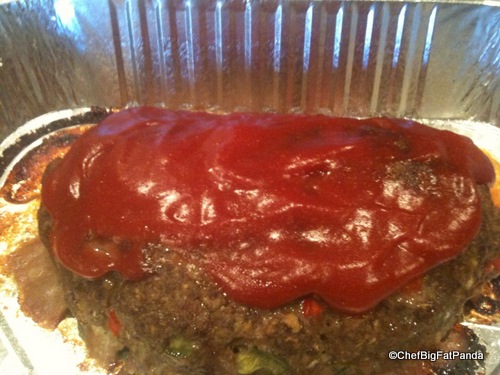
Back in the Oven With the Sauce

